

Understanding Object Caching in WordPress
WordPress generates dynamic content by querying the database repeatedly for every page load. While this flexibility powers the platform's strength, it creates performance bottlenecks as traffic scales. Object caching addresses this by storing the results of expensive database queries in memory, dramatically reducing database load and improving response times.
Many site owners confuse object caching with page caching, leading to suboptimal configurations. Page caching stores complete HTML pages and serves them to visitors without invoking PHP or WordPress at all. Object caching operates at a different layer entirely—it stores individual pieces of data that WordPress and plugins repeatedly fetch from the database. Both serve distinct purposes, and high-traffic sites typically need both working together.
When Persistent Object Caching Makes Sense
WordPress includes a built-in object cache that stores data in PHP memory for the duration of a single page request. This transient cache disappears when the request completes. Persistent object caching extends this lifetime across requests by storing cached objects in dedicated memory stores like Redis or Memcached.
Consider persistent object caching when you encounter these scenarios:
- Database queries exceed 100-200 per page load, indicating repetitive data fetching
- Traffic surpasses 10,000 daily visitors, where marginal gains compound significantly
- Your site uses WooCommerce, membership plugins, or complex queries that stress the database
- Database CPU utilization consistently runs above 60-70 percent
- Multiple sites share a single database server, creating resource contention
For small blogs with modest traffic, the overhead of maintaining a separate caching service outweighs the benefits. The built-in transient cache suffices until traffic demands more optimization.
Redis vs Memcached: Choosing Your Cache Engine
Both Redis and Memcached excel at storing key-value pairs in memory, but their architectures differ in ways that matter for WordPress deployments.
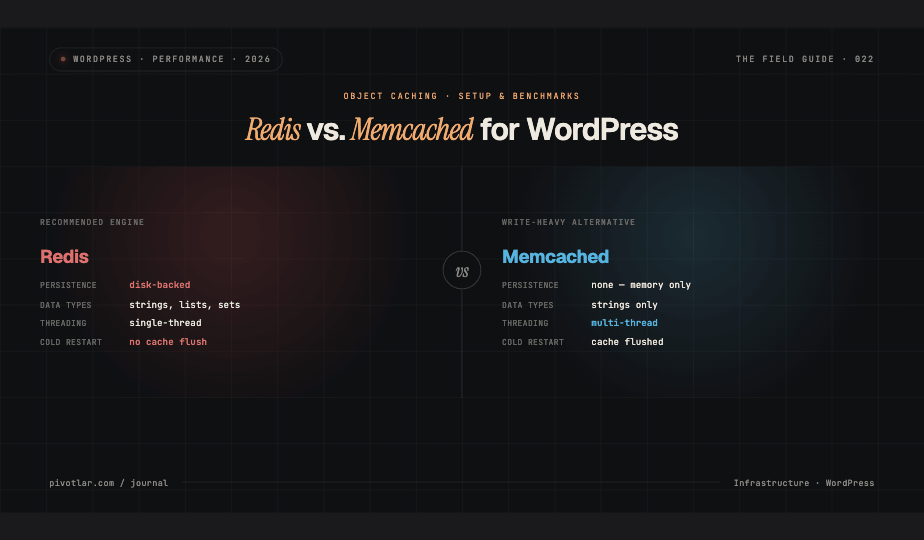
Redis provides richer data structures beyond simple strings, including lists, sets, and sorted sets. It supports persistence to disk, meaning cached data survives server restarts. Redis operates single-threaded but efficiently, making it ideal for WordPress workloads dominated by read operations. The LRU eviction policy ensures the most valuable data remains cached when memory fills.
Memcached focuses purely on caching with a simpler architecture. It runs multi-threaded, potentially offering better performance on multi-core systems under write-heavy workloads. However, WordPress rarely generates such patterns. Memcached stores data purely in memory with no persistence option—restarts flush the entire cache.
For most WordPress deployments, Redis offers the better balance of performance, reliability, and operational simplicity. Its persistence prevents cold-start scenarios where an empty cache temporarily hammers the database after restarts.
Installing and Configuring Redis for WordPress
First, install the Redis server on your VPS or dedicated server. On Ubuntu or Debian systems, use the package manager:
sudo apt update
sudo apt install redis-server
Verify Redis runs correctly by testing the connection:
redis-cli ping
A response of PONG confirms successful installation. Configure Redis to listen only on localhost by editing /etc/redis/redis.conf and ensuring the bind directive reads:
bind 127.0.0.1
This prevents external access to your cache. Restart Redis to apply changes:
sudo systemctl restart redis-server
Next, install the Redis Object Cache plugin for WordPress. Connect via SSH and install the PHP Redis extension:
sudo apt install php-redis
sudo systemctl restart php-fpm
Download and activate the Redis Object Cache plugin from the WordPress repository. Navigate to Settings → Redis in your dashboard and click Enable Object Cache. The plugin creates a object-cache.php drop-in in wp-content that routes cache calls to Redis.
Configuring Memcached for WordPress
Install Memcached through your package manager:
sudo apt update
sudo apt install memcached php-memcached
Configure Memcached by editing /etc/memcached.conf. Set memory allocation based on available RAM—typically 64-128MB for single-site installations:
-m 128
Ensure Memcached binds only to localhost:
-l 127.0.0.1
Restart services to apply configuration:
sudo systemctl restart memcached php-fpm
Install the Memcached Object Cache plugin from the WordPress plugin directory. Activate it and copy the provided object-cache.php file to your wp-content directory. WordPress immediately begins routing cache operations through Memcached.
Measuring Real Performance Gains
Enable the Query Monitor plugin to measure baseline database queries before enabling object caching. Navigate through representative pages—homepage, archives, single posts—and record query counts. Typical WordPress sites execute 50-300 queries per uncached page load.
After enabling persistent object caching and warming the cache through normal browsing, measure again. Properly configured object caching reduces query counts by 60-90 percent. A homepage executing 120 queries might drop to 15-30 queries, with most remaining queries fetching genuinely dynamic data that should not be cached.
Monitor database CPU utilization through your hosting control panel or tools like htop. Effective object caching shifts load from the database server to the cache server, often reducing database CPU usage by 40-70 percent under steady traffic.
Response time improvements vary by site complexity, but reductions of 100-400 milliseconds are common for database-heavy pages. Use tools like Blackfire or New Relic to profile specific bottlenecks and verify that caching eliminates them.
Operational Considerations
Persistent object caching introduces operational complexity. Plan for cache invalidation when content changes—most plugins handle this automatically, but custom code may require explicit cache clearing. Monitor cache hit rates through Redis CLI or Memcached stats to ensure effectiveness typically exceeds 80 percent.
Allocate memory carefully. Start with 64-128MB for single sites and monitor usage patterns. Redis provides memory stats through redis-cli info memory. When maxmemory is reached, the LRU eviction policy removes least-recently-used items, maintaining performance without manual intervention.
Persistent object caching transforms WordPress performance under load, but only when traffic patterns justify the operational overhead. Start with solid page caching foundations, then add object caching when database queries become the measurable bottleneck. The result is a WordPress infrastructure that scales efficiently as your traffic grows.